Create React Native App
Create a Mobile App with React Native
In this step, we are going to build a mobile application using React Native. React Native is a build-once, deploy both framework that uses the same concepts of ReactJS, but deploys a runtime to create native mobile components for iOS and Android.
Pre-Requisites
Install Expo on your mobile phone
You will need to download the Expo app on your iOS or Android phone. This will be used to test the native mobile app while we are developing it.
- iOS: https://itunes.apple.com/app/apple-store/id982107779
- Android: https://play.google.com/store/apps/details?id=host.exp.exponent&referrer=www
Build Your React Native Mobile App
Return to your Cloud9 environment, and make sure you are in the ~/environment directory by changing to the directory: (Press CTRL-C to stop any running web server.)
cd ~/environment
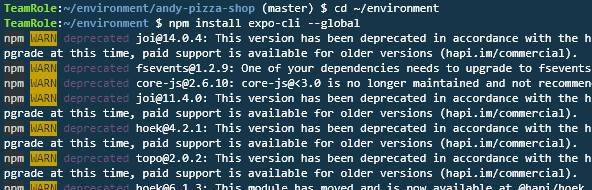
To begin building a React Native mobile app, first install Expo CLI
npm install expo-cli --global
You may receive warning messages during this step - no need to worry - that is expected.
Expo is a development toolkit and harness for testing your React Native applications. It provides simulator integration for XCode (iOS) and Android Studio. It also provides a native mobile app for each platform, in which case it will connect to your local server to download the JavaScript bundle that will then be translated into native elements.
Next, create a new react native app using expo init. Again, make sure you are working in the ~/environment directory.
#change to root Cloud9 directory
cd ~/environment
# initialize a react native app via the expo cli
expo init andy-pizza-mobile
Choose the blank template:
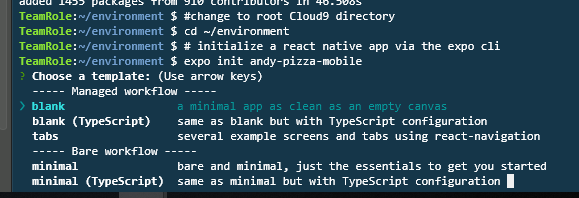
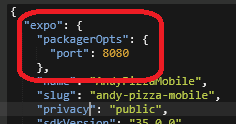
Enter AndyPizzaMobile as the application name and then select Enter. Once the installation is complete, open the andy-pizza-mobile/app.json file and add this under the expo section. Save the app.json file
    "packagerOpts": {
      "port": 8080
    }
Before running the next step, make sure the previous development server is no longer running in another terminal. If it is, use CTRL-C to kill the process.
Next, run the following commands in the terminal window to start the expo server.
cd andy-pizza-mobile
export env REACT_NATIVE_PACKAGER_HOSTNAME=127.0.0.1 && expo start --tunnel
If you get prompted to install a package to support tunnels, enter Y.
Upon starting, you will see a URL and a QR code. Follow the instructions below based on your phone OS:
| For iOS Users | For Android Users |
|---|---|
You can open up the iOS camera app and scan the QR code with your phone.
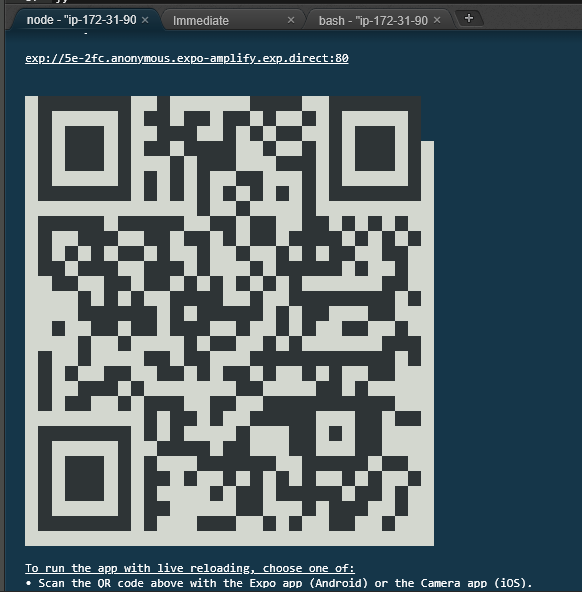
Assuming you have the Expo app installed on your phone, it will ask to open up in Expo.
If the QR code does not work, you can copy the URL that is displayed and send it to your phone via e-mail. |
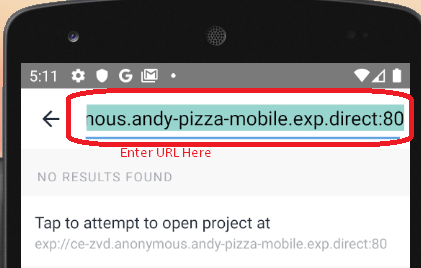
Open the Expo Client app on your Android phone, then select 'Explore' from the bottom tab.

Then, click the Search icon and enter the URL that is displayed in the Cloud9 terminal:
|

Once the Expo app opens, you will see a white screen with a dotted line box.
![]()
It will stay like that until the Expo server, which is running in Cloud9, completes its javascript packaging.

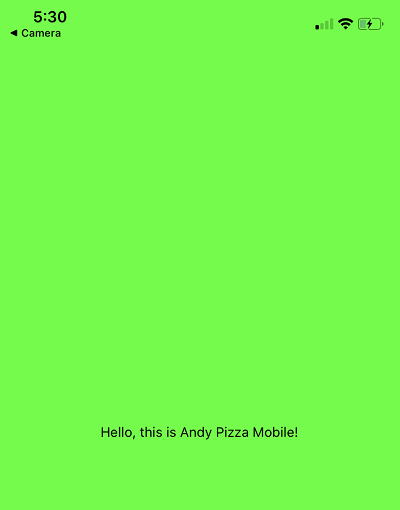
After the server bundles the JavaScript files needed for the applicaiton, you should see a default message from the Expo mobile app.

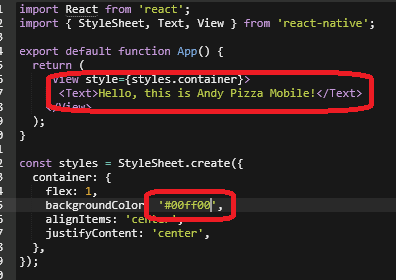
You can now modify the andy-pizza-mobile/App.js file and the app on your phone will perform a hot reload.
 | ===> |  |
Install Amplify and supporting libraries
Before continuing, make sure you stop the development server by typing CTRL/CMD-C.
To continue our development, we first need to install the amplify libraries and then run amplify pull to re-use our existing backend:
npm install --save aws-amplify aws-amplify-react-native native-base
npm install @react-native-community/netinfo @react-native-async-storage/async-storage
After completion, run the command amplify pull, choose andyspizzashop.
amplify pull
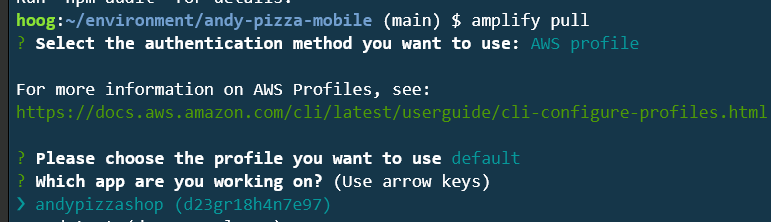
Continue with the default settings. Choose Y when asked if you plan on modifying the backend.
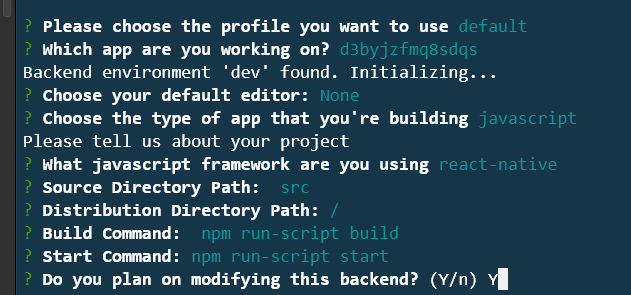
This will create the andy-pizza-mobile/aws-exports.js file.
Next, do the following:
- In the terminal, enter amplify codegen add and hit Enter. You can select all the default values.
amplify codegen add

This command generated code to use in our React Native application, using the GraphQL API operations.
Add your code
Now that we have initialized amplify and generated our graphQL code, we just need to add our business logic into the app.
You might be asking, how does my React Native project know about all the AWS services I previously created? The secret is in the aws-exports.js file. In our code, we load this file using Amplify.configure() method. This way, we can re-use all of those services that were previously created - all we had to do was initialize this as a new amplify project. Magic!
In the andy-pizza-mobile/App.js file, replace the following code and Save App.js:
import React, {Component} from 'react';
import { StyleSheet, Text, View, TouchableOpacity } from 'react-native';
import { Button, Container, Header, Footer, Tab, Tabs, DefaultTabBar, List, ListItem, Icon, Left, Right, Accordion, Thumbnail } from 'native-base';
import Amplify, {Auth, Hub, Cache, API, graphqlOperation, Analytics} from 'aws-amplify'
import { createOrder, createItem, updateOrder,  createReview, createReviewPhrase } from "./src/graphql/mutations";
import awsconfig from "./src/aws-exports";
import { withAuthenticator, ChatBot } from 'aws-amplify-react-native';

Amplify.configure(awsconfig);
Amplify.configure({Analytics: { disabled: true }});

class App extends Component {
  state = {
    currentUser: "",
    menuLoaded: false,
    currentOrder: null
  }

  isRecommended(pid) {
    if (this.state.recommendations) {
      var firstResult = this.state.recommendations[0];
      if (firstResult) {
        if (firstResult.productId === pid)
         return <Icon name="star" style={{ fontSize: 15, color: "#ffff00", lineHeight: 20 }}/>;
      }
    }
    return "";
  }
    loadCurrentUser() {
    Auth.currentAuthenticatedUser().then(userInfo => {
      this.setState({
        loggedIn: true,
        currentUser: userInfo.username,
        currentUserData: userInfo
      });
    });
  }

    loadRecommendations() {
    // Get recommendation

    const getRecos = `
    query getRecos {
      getRecommendations(filter: {
        userId: {
          eq: "${this.state.currentUser}"
        }
      }) {
        items {
          itemId
          userId
          priority
        }
      }
    }
    `;
    API.graphql(graphqlOperation(getRecos))
      .then(result => {
        var firstResult = result.data.getRecommendations.items[0];
        var filterResult = this.state.menuItems.filter(
          myItem => myItem.productId === firstResult.itemId
        );
        this.setState({
          recommendedItems: result.data.getRecommendations.items,
          recommendations: filterResult
        });
      })
      .catch(err => {
        console.log("RECO ERR", err);
      });

  }

  loadMenuItems() {
        // Get menu items
    const limit = {
      limit: 100
    };

    API.graphql(graphqlOperation(this.listProductsWithVariant, limit)).then(result => {
      this.setState({
        menuItems: result.data.listProducts.items,
        menuLoaded: true
      });

    });

  }

  componentDidMount() {

    this.loadCurrentUser();
  this.loadMenuItems();
  }

    listProductsWithVariant = `query ListProducts(
    $filter: ModelProductFilterInput
    $limit: Int
    $nextToken: String
  ) {
    listProducts(filter: $filter, limit: $limit, nextToken: $nextToken) {
      items {
        id
        productId
        productName
        category
        description
        defaultPrice
        sizes {
            items {
              id
              price
              size
            }
          }
      }
      nextToken
    }
  }
  `;

  async loadExistingOrder(orderId) {
    const getOrderWithItems = `query GetOrder($id: ID!) {
      getOrder(id: $id) {
        id
        name
        user
        phone
        email
        orderDate
        orderTotal
        deliveryType
        deliveryDate
        status
        items {
          items {
            id
            itemName
            comments
            quantity
            size
            unitPrice
            totalPrice
          }
          nextToken
        }
      }
    }
    `;
    // Now we want to update the state with the new order data
    const orderInput = {
      id: orderId
    };
    const getOrderResult = await API.graphql(
      graphqlOperation(getOrderWithItems, orderInput)
    );
    this.setState({
      currentOrder: getOrderResult.data.getOrder
    });
  }

  createNewItem = async itemInput => {
    const newItem = await API.graphql(
      graphqlOperation(createItem, {
        input: itemInput
      })
    );
    return newItem;
  };

  createNewOrder = async orderInput => {
    const newOrder = await API.graphql(
      graphqlOperation(createOrder, {
        input: orderInput
      })
    );
    return newOrder;
  };

  getTotalFloat = items => {
    var totalPrice = 0;
    for (var i in items) {
      var qty = items[i]["quantity"];
      var price = items[i]["unitPrice"];
      var qtyPrice = qty * price;
      totalPrice += qtyPrice;
    }
    return totalPrice;
  };

  getTotal = items => {
    var totalPrice = 0;
    for (var i in items) {
      var qty = items[i]["quantity"];
      var price = items[i]["unitPrice"];
      var qtyPrice = qty * price;
      totalPrice += qtyPrice;
    }
    return totalPrice.toFixed(2);
  };


  appendLeadingZeroes = n => {
    if (n <= 9) {
      return "0" + n;
    }
    return n;
  };

  createOrderName(today) {
    return (
      today.getFullYear() +
      "-" +
      this.appendLeadingZeroes(today.getMonth() + 1) +
      "-" +
      this.appendLeadingZeroes(today.getDate())
    );
  }

  getOrderDate(today) {
    return (
      today.getFullYear() +
      "-" +
      this.appendLeadingZeroes(today.getMonth() + 1) +
      "-" +
      this.appendLeadingZeroes(today.getDate()) +
      "T" +
      this.appendLeadingZeroes(today.getHours()) +
      ":" +
      this.appendLeadingZeroes(today.getMinutes()) +
      ":" +
      this.appendLeadingZeroes(today.getSeconds()) +
      "-05:00:00"
    );
  }

  async createNewOrderConstruct() {
    var today = new Date();
    var orderName = this.createOrderName(today);
    var orderDate = this.getOrderDate(today);

    const orderInput = {
      name: "ORDER: " + orderName,
      user: this.state.currentUser,
      phone: this.state.currentUserData.attributes.phone_number,
      email: this.state.currentUserData.attributes.email,
      orderDate: orderDate,
      orderTotal: this.getTotal(this.state.currentOrder),
      deliveryType: "Carryout",
      deliveryDate: orderDate,
      status: "IN PROGRESS"
    };

    const newOrder = await this.createNewOrder(orderInput);
    return newOrder;
  }

addItemToCart = async (item, comments) => {

    var checkOrder = this.state.currentOrder;
    if (!checkOrder) {
      // Create new order
      //var cUser = await Auth.currentAuthenticatedUser();
      var today = new Date();
      const expiration = new Date(today.getTime() + 60 * 60000);
      var newOrder = await this.createNewOrderConstruct();
      Cache.setItem("currentOrder", newOrder.data.createOrder.id, {
        priority: 3,
        expires: expiration.getTime()
      });
      checkOrder = newOrder.data.createOrder;
    }

    var currentOrderId = checkOrder.id;

    const totalPrice = item.quantity * item.price;
    const itemInput = {
      itemName: item.itemName,
      comments: comments,
      quantity: item.quantity,
      size: item.size,
      unitPrice: item.price,
      totalPrice: totalPrice,
      itemOrderId: currentOrderId
    };
    await this.createNewItem(itemInput);
    const sourceType = "menu";
    if (itemInput.sourceType)
      sourceType = itemInput.sourceType;
    const analyticsRecord = { name: 'ADD_ITEM', attributes: { SOURCE: sourceType, PRODUCT_ID: item.itemId, ITEM_NAME: item.itemName,  ITEM_CATEGORY: item.category, SIZE: item.size, ORDER: currentOrderId, USER: this.state.currentUser }, metrics: { QUANTITY: item.quantity, TOTAL_PRICE: totalPrice, UNIT_PRICE: item.price}};
    Analytics.record(analyticsRecord);
    this.loadExistingOrder(currentOrderId);

  alert('Added ' + item.itemName + ' to cart');
}

 addProduct(item, size) {
            const itemInput = {
              itemName: item.productName,
              itemId: item.productId,
              size: size.size,
              price: size.price,
              quantity: 1,
              category: item.category
            }
            this.addItemToCart(itemInput, "Ordered from menu");
  }


  _renderHeader(item, expanded) {
    return (
      <View style={{
        flexDirection: "row",
        padding: 10,
        justifyContent: "space-between",
        alignItems: "center" ,
        backgroundColor: "#A9DAD6" }}>
      <Text style={{ fontWeight: "600" }}>
          <Text></Text>
          {" "}{item.productName}
        </Text>
        {expanded
          ? <Icon style={{ fontSize: 18 }} name="remove-circle" />
          : <Icon style={{ fontSize: 18 }} name="add-circle" />}
      </View>
    );
  }
  _renderContent(item, item2) {
    return (
      <View>
      <Text
        style={{
          backgroundColor: "#e3f1f1",
          padding: 10,
          fontStyle: "italic",
        }}
      >
        {item.description}
      </Text>
      <List>
      {
       item.sizes.items.map(size => (
       <ListItem key={size.id}>
        <Left><Text>{size.size} - ${size.price.toString()}</Text></Left>
        <Right>
         <Button onPress={() => this.addProduct(item, size)}>
             <Icon name='ios-add-circle' />
         </Button>
        </Right>
      </ListItem>
       )
       )
      }
      </List>
      </View>
    );
  }

  getPrice(item) {
    return "$" + item.totalPrice.toString();
  }
  getName(item) {
    return item.itemName + "(" + item.quantity.toString() + ")"
  }
  getCartQty() {
    var retText = "Cart";
    if (this.state.currentOrder)
     retText = "Cart (" + this.state.currentOrder.items.items.length.toString() + ")"
    return retText;
  }

  chatItemHelper(specialty) {
    var specLower = ""
    if (specialty)
      specLower = specialty.toLowerCase();
    switch (specLower) {
      case "supreme":
        return "0002";
      case "ultimate":
        return "0001";
      case "veggie":
        return "0003";
      case "meat lovers":
        return "0008";
      default:
        return "0004";
    }
  }

  getPriceForSize(pId, selSize) {
    const retVal = this.state.menuItems.filter(item => item.productId === pId);
    const rVal2 = retVal[0].sizes.items.filter(
      item2 => item2.size.toUpperCase() === selSize.toUpperCase()
    );
    return rVal2[0].price;
  }

  handleComplete(err, confirmation) {
    if (err) {
      console.log("Bot conversation failed");
      return;
    }

    var pid = this.chatItemHelper(confirmation.slots.specialty);
    var price = this.getPriceForSize(pid, confirmation.slots.size);
    var specName = confirmation.slots.specialty;
    if (!specName) specName = "Cheese Pizza";
    var item = {
      itemName: specName,
      quantity: 1,
      price: price,
      size: confirmation.slots.size,
      itemId: pid,
      category: "PIZZA"
    };
    this.addItemToCart(item, "Ordered from Chatbot");
    return "Great, I am adding that to your order!";
  }

  completeOrder = () => {
    const totalPrice = this.getTotal(this.state.currentOrder.items.items);
    const totalPriceFloat = this.getTotalFloat(this.state.currentOrder.items.items);
    const totalItems = this.state.currentOrder.items.items.length;
    const orderInput = {
      id: this.state.currentOrder.id,
      name: this.state.currentOrder.name,
      user: this.state.currentUser,
      phone: this.state.currentOrder.phone,
      email: this.state.currentOrder.email,
      orderDate: this.state.currentOrder.orderDate,
      orderTotal: totalPrice,
      deliveryType: "Carryout",
      deliveryDate: this.state.currentOrder.deliveryDate,
      status: "COMPLETE"
    };

    const analyticsRecord = { name: 'COMPLETE_ORDER', attributes: { SOURCE: "checkout", ORDER_TYPE: "Carryout", ORDER: this.state.currentOrder.id, USER: this.state.currentUser }, metrics: { QUANTITY: totalItems, TOTAL_PRICE: totalPriceFloat}};
    Analytics.record(analyticsRecord);

    API.graphql(
      graphqlOperation(updateOrder, {
        input: orderInput
      })
    ).then(result => {
      this.setState({
        currentOrder: null
      });
      Cache.removeItem("currentOrder");
    });

    alert('Your order is complete and on its way!');

  };

renderTabBar = (props) => {
  props.tabStyle = Object.create(props.tabStyle);
  return <DefaultTabBar {...props} />;
};

  render() {
  return (
      <Container>

        <Header hasTabs>
         <Text>Welcome to Andy's Mobile</Text>
         <Thumbnail source={{uri: 'https://jah-lex-workshop-2018.s3.amazonaws.com/mob302/images/0001.png'}} />
        </Header>
        <Tabs renderTabBar={this.renderTabBar}>
          <Tab heading="Menu">


                    { this.state.menuLoaded ?

  <Accordion dataArray={this.state.menuItems} expanded={[0]}
                                renderHeader={this._renderHeader.bind(this)}
            renderContent={this._renderContent.bind(this)}
                    >
                    </Accordion>
                    : null
                    }

          </Tab>
          <Tab heading={this.getCartQty()}>

                    { this.state.currentOrder ?

                    <List>
                     {this.state.currentOrder.items.items.map(item => (
                      <ListItem key={item.id} button selected >
                       <Left>
                        <Text>{this.getName(item)}</Text>
                       </Left>
                       <Right>
                        <Text>{this.getPrice(item)}</Text>
                       </Right>
                      </ListItem>
                     )
                     )
                     }
                     <ListItem key="total">
                      <Left><Text>Total</Text></Left>
                      <Right><Text>{this.getTotal(this.state.currentOrder.items.items)}</Text></Right>
                     </ListItem>
                    <ListItem key="complete">
                      <Button primary style={{padding: 10}} onPress={this.completeOrder.bind(this)}>
                       <Text style={{color: '#ffffff'}} >Complete</Text>
                      </Button>
                    </ListItem>
                    </List>
                    : <Text>No Current Items</Text>
                    }
          </Tab>
        </Tabs>
        <Footer>
          <Text>Andy's Mobile... re:Invent 2019</Text>
        </Footer>
      </Container>
  );
  }
}
export default withAuthenticator(App);

const styles = StyleSheet.create({
  container: {
    flex: 1,
    backgroundColor: '#fff',
    alignItems: 'center',
    justifyContent: 'center',
  },
  button: {
    backgroundColor: "#99AAFF",
    borderRadius: 5,
    borderWidth: 1,
    borderColor: "#0000CC"
  }
});
Now, run the following command again to build your app.
export env REACT_NATIVE_PACKAGER_HOSTNAME=127.0.0.1 && expo start --tunnel
Re-load the Expo app (using the QR Code or URL), and you should now see now see your Andy’s Mobile App running.
Test the React Native mobile app
You can now test the functions of your mobile app. It will be using all of the same services that you previously deployed.
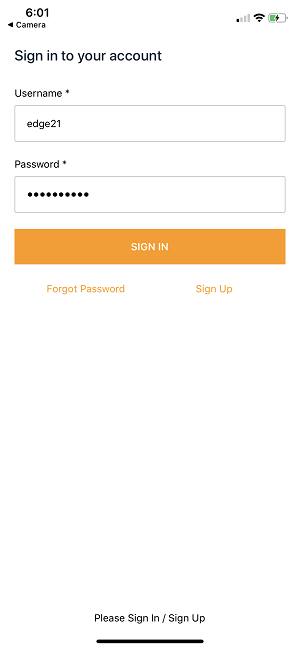
Login
The app does force authentication. Login using the same edge21 user that you previously created.
View the menu
The menu is loaded from the AppSync API.
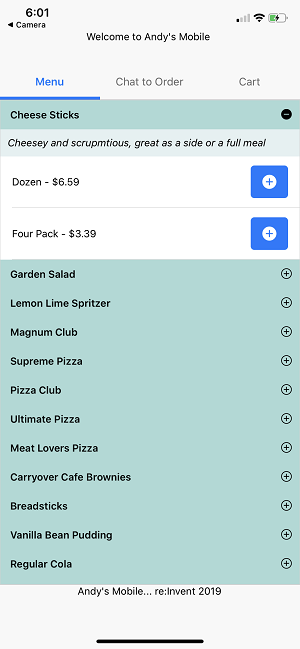
Click the + icon to add an item to the cart. The Cart header should update with the quantity.
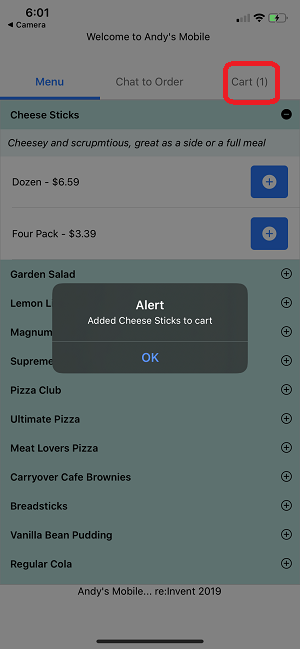
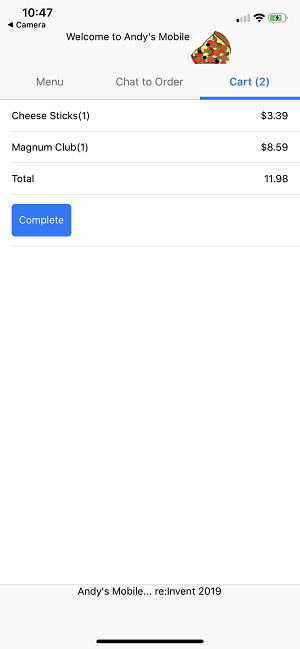
View Cart
Click the Cart tab to view your cart and check out.
That concludes the building of your React Native mobile application.
This workshop only covers the development of the React Native app. Once you are ready to deploy your React Native app to the Apple or Google app stores, you can find instructions on doing so in the Expo docs: https://docs.expo.io/versions/latest/distribution/app-stores/